Salesforce Platform Developer I:LWC Appインストールの三つ方法
LWC Appインストールの三つ方法
・ロック解除パッケージを使用したアプリのインストール:
このオプションを使用すると、ローカルの開発環境をインストールしなくても、誰でもサンプルアプリを体験できます。
・Scratch Orgを使用したアプリのインストール:
これは推奨されるインストールオプションです。アプリとコードを体験したい開発者の場合は、このオプションを使用してください。
・DeveloperEdition組織またはTrailheadPlaygroundを使用したアプリのインストール:
Trailheadバッジに取り組む場合、またはアプリをScratch組織よりも永続的な環境にデプロイする場合に便利です。
各方法のやり方
ロック解除パッケージを使用したアプリのインストール
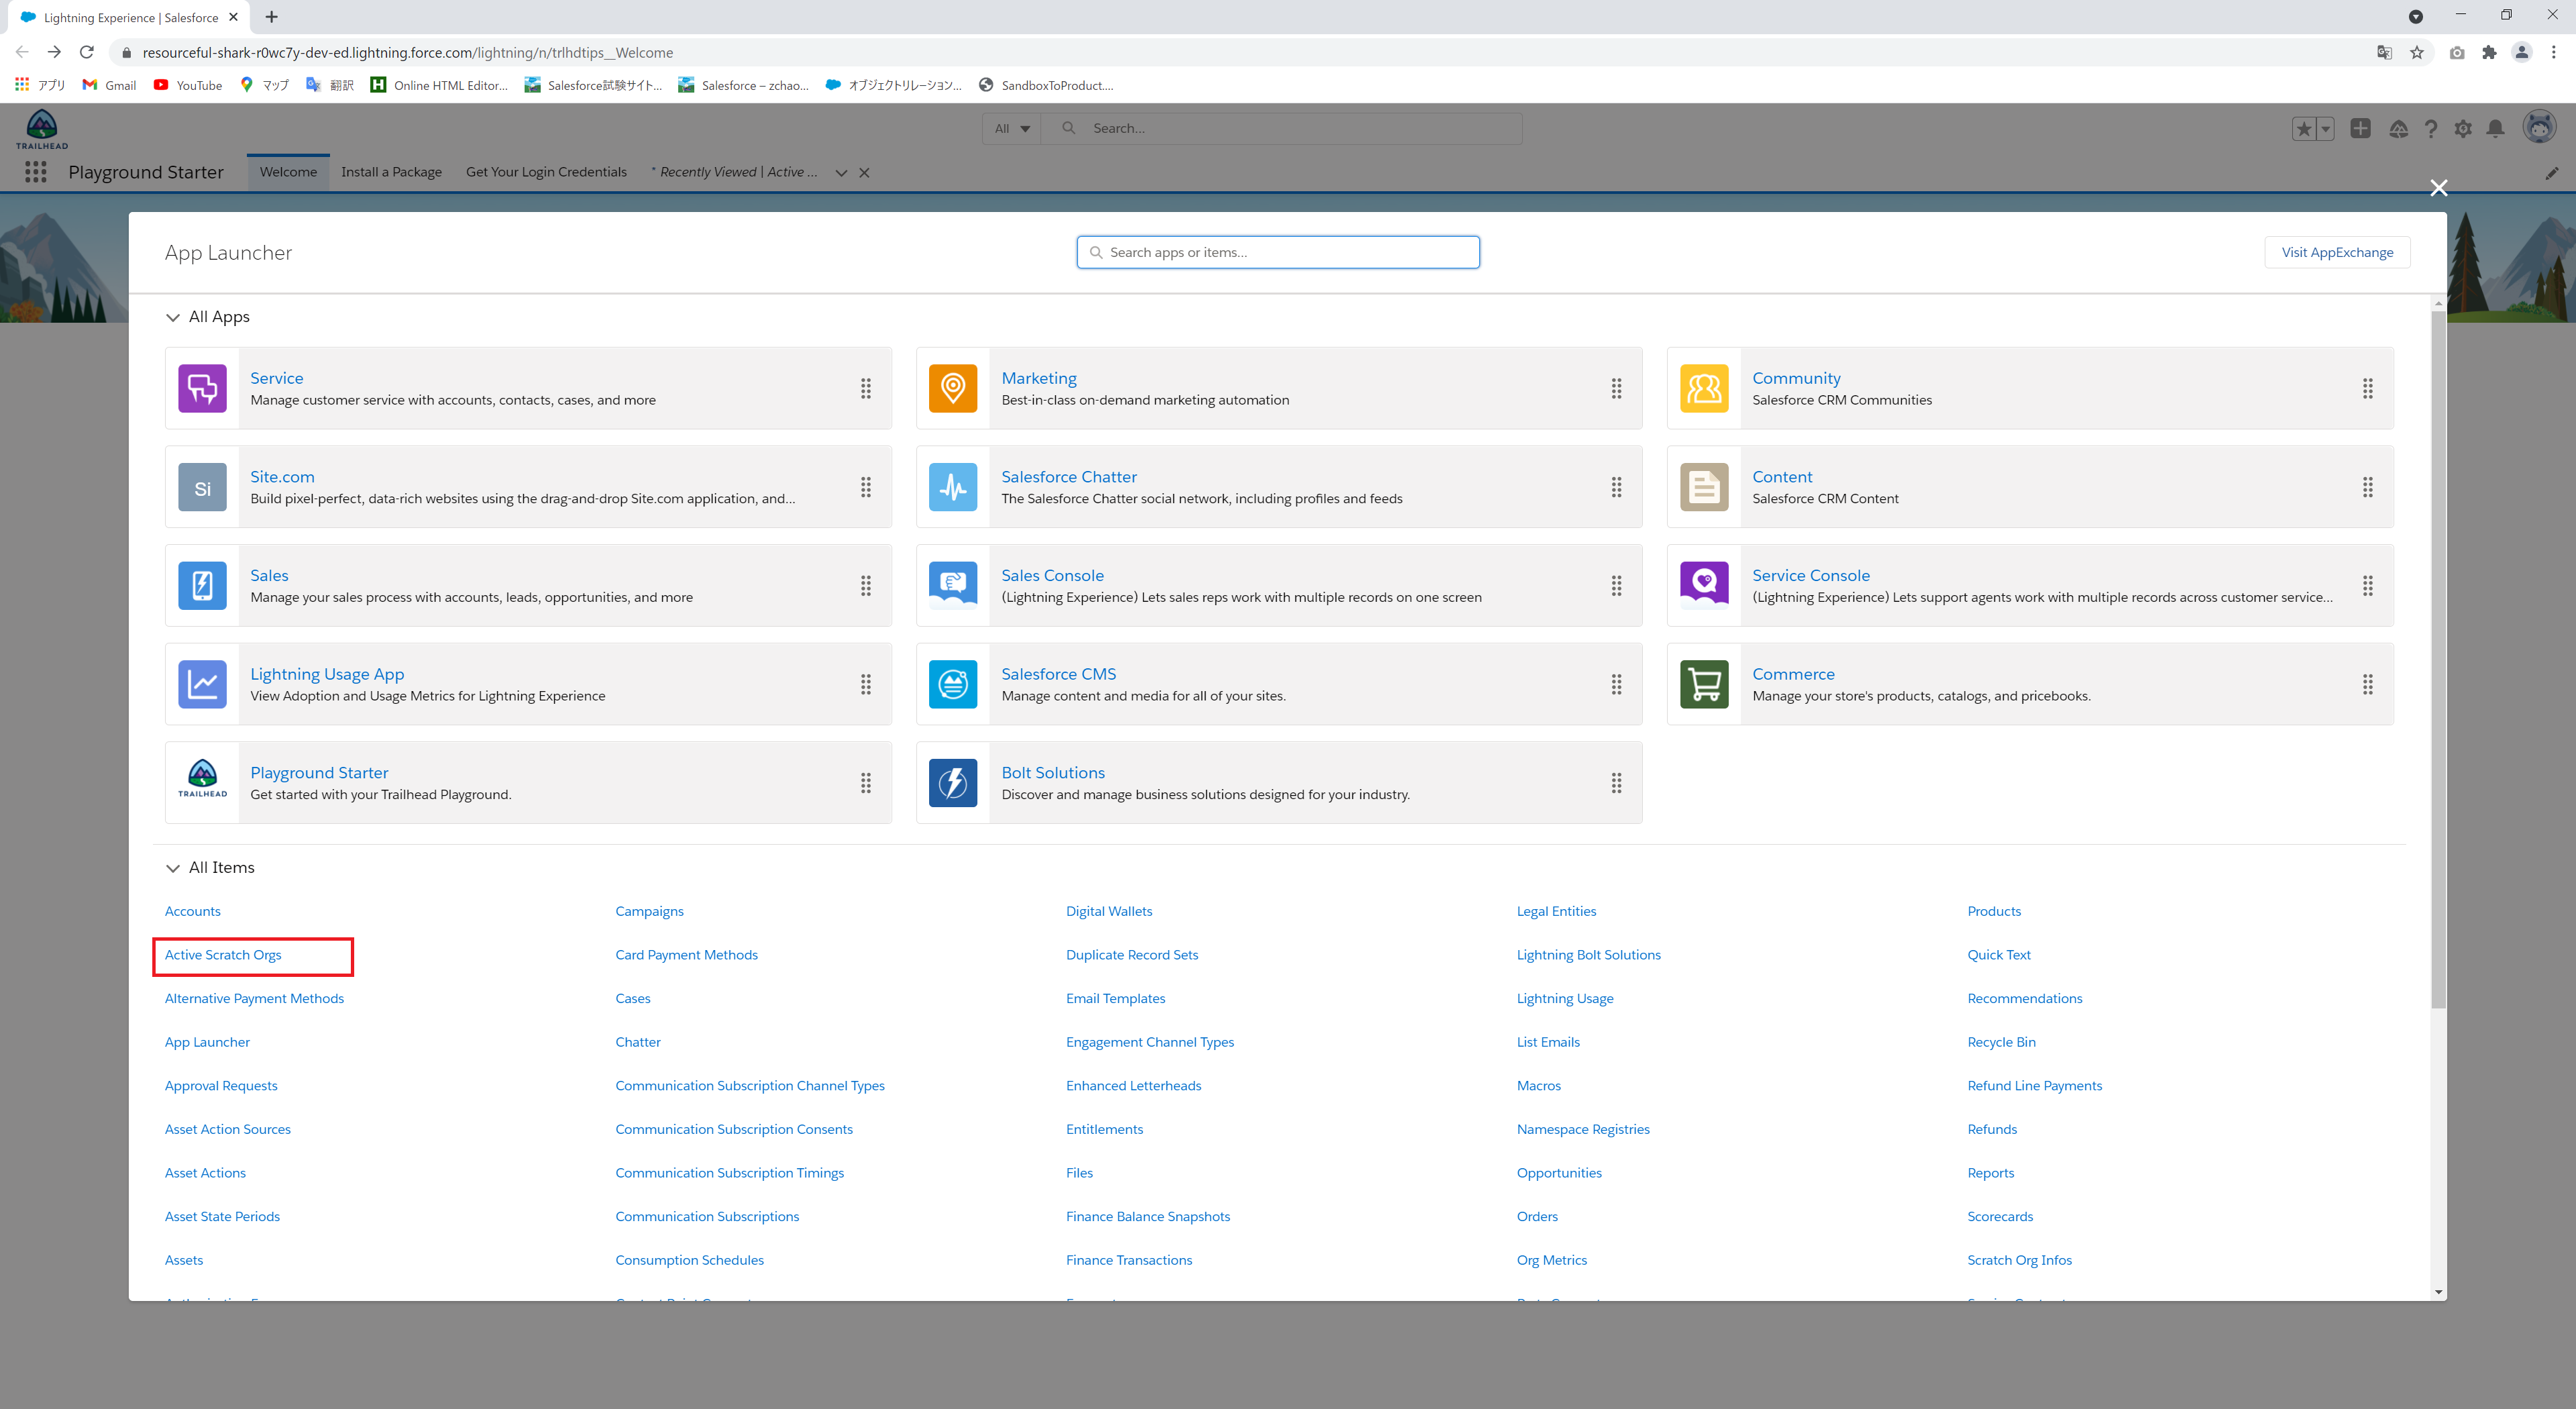
①「playground Starter」の「パッケージをインストールする」をクリック
②以下のパッケージIDを入力して、「すべてのユーザのインストール」を選択して、インストールする
"04t3t000002sAHUAA2"


③以下のリンクからcsvファイルダウンロード、データインポートウィザードで「取引先と取引先責任者」をインポートする
https://raw.githubusercontent.com/trailheadapps/lwc-recipes/main/data/Accounts-Contacts.csv


④割り当ての管理設定


⑤テーマおよびブランド設定

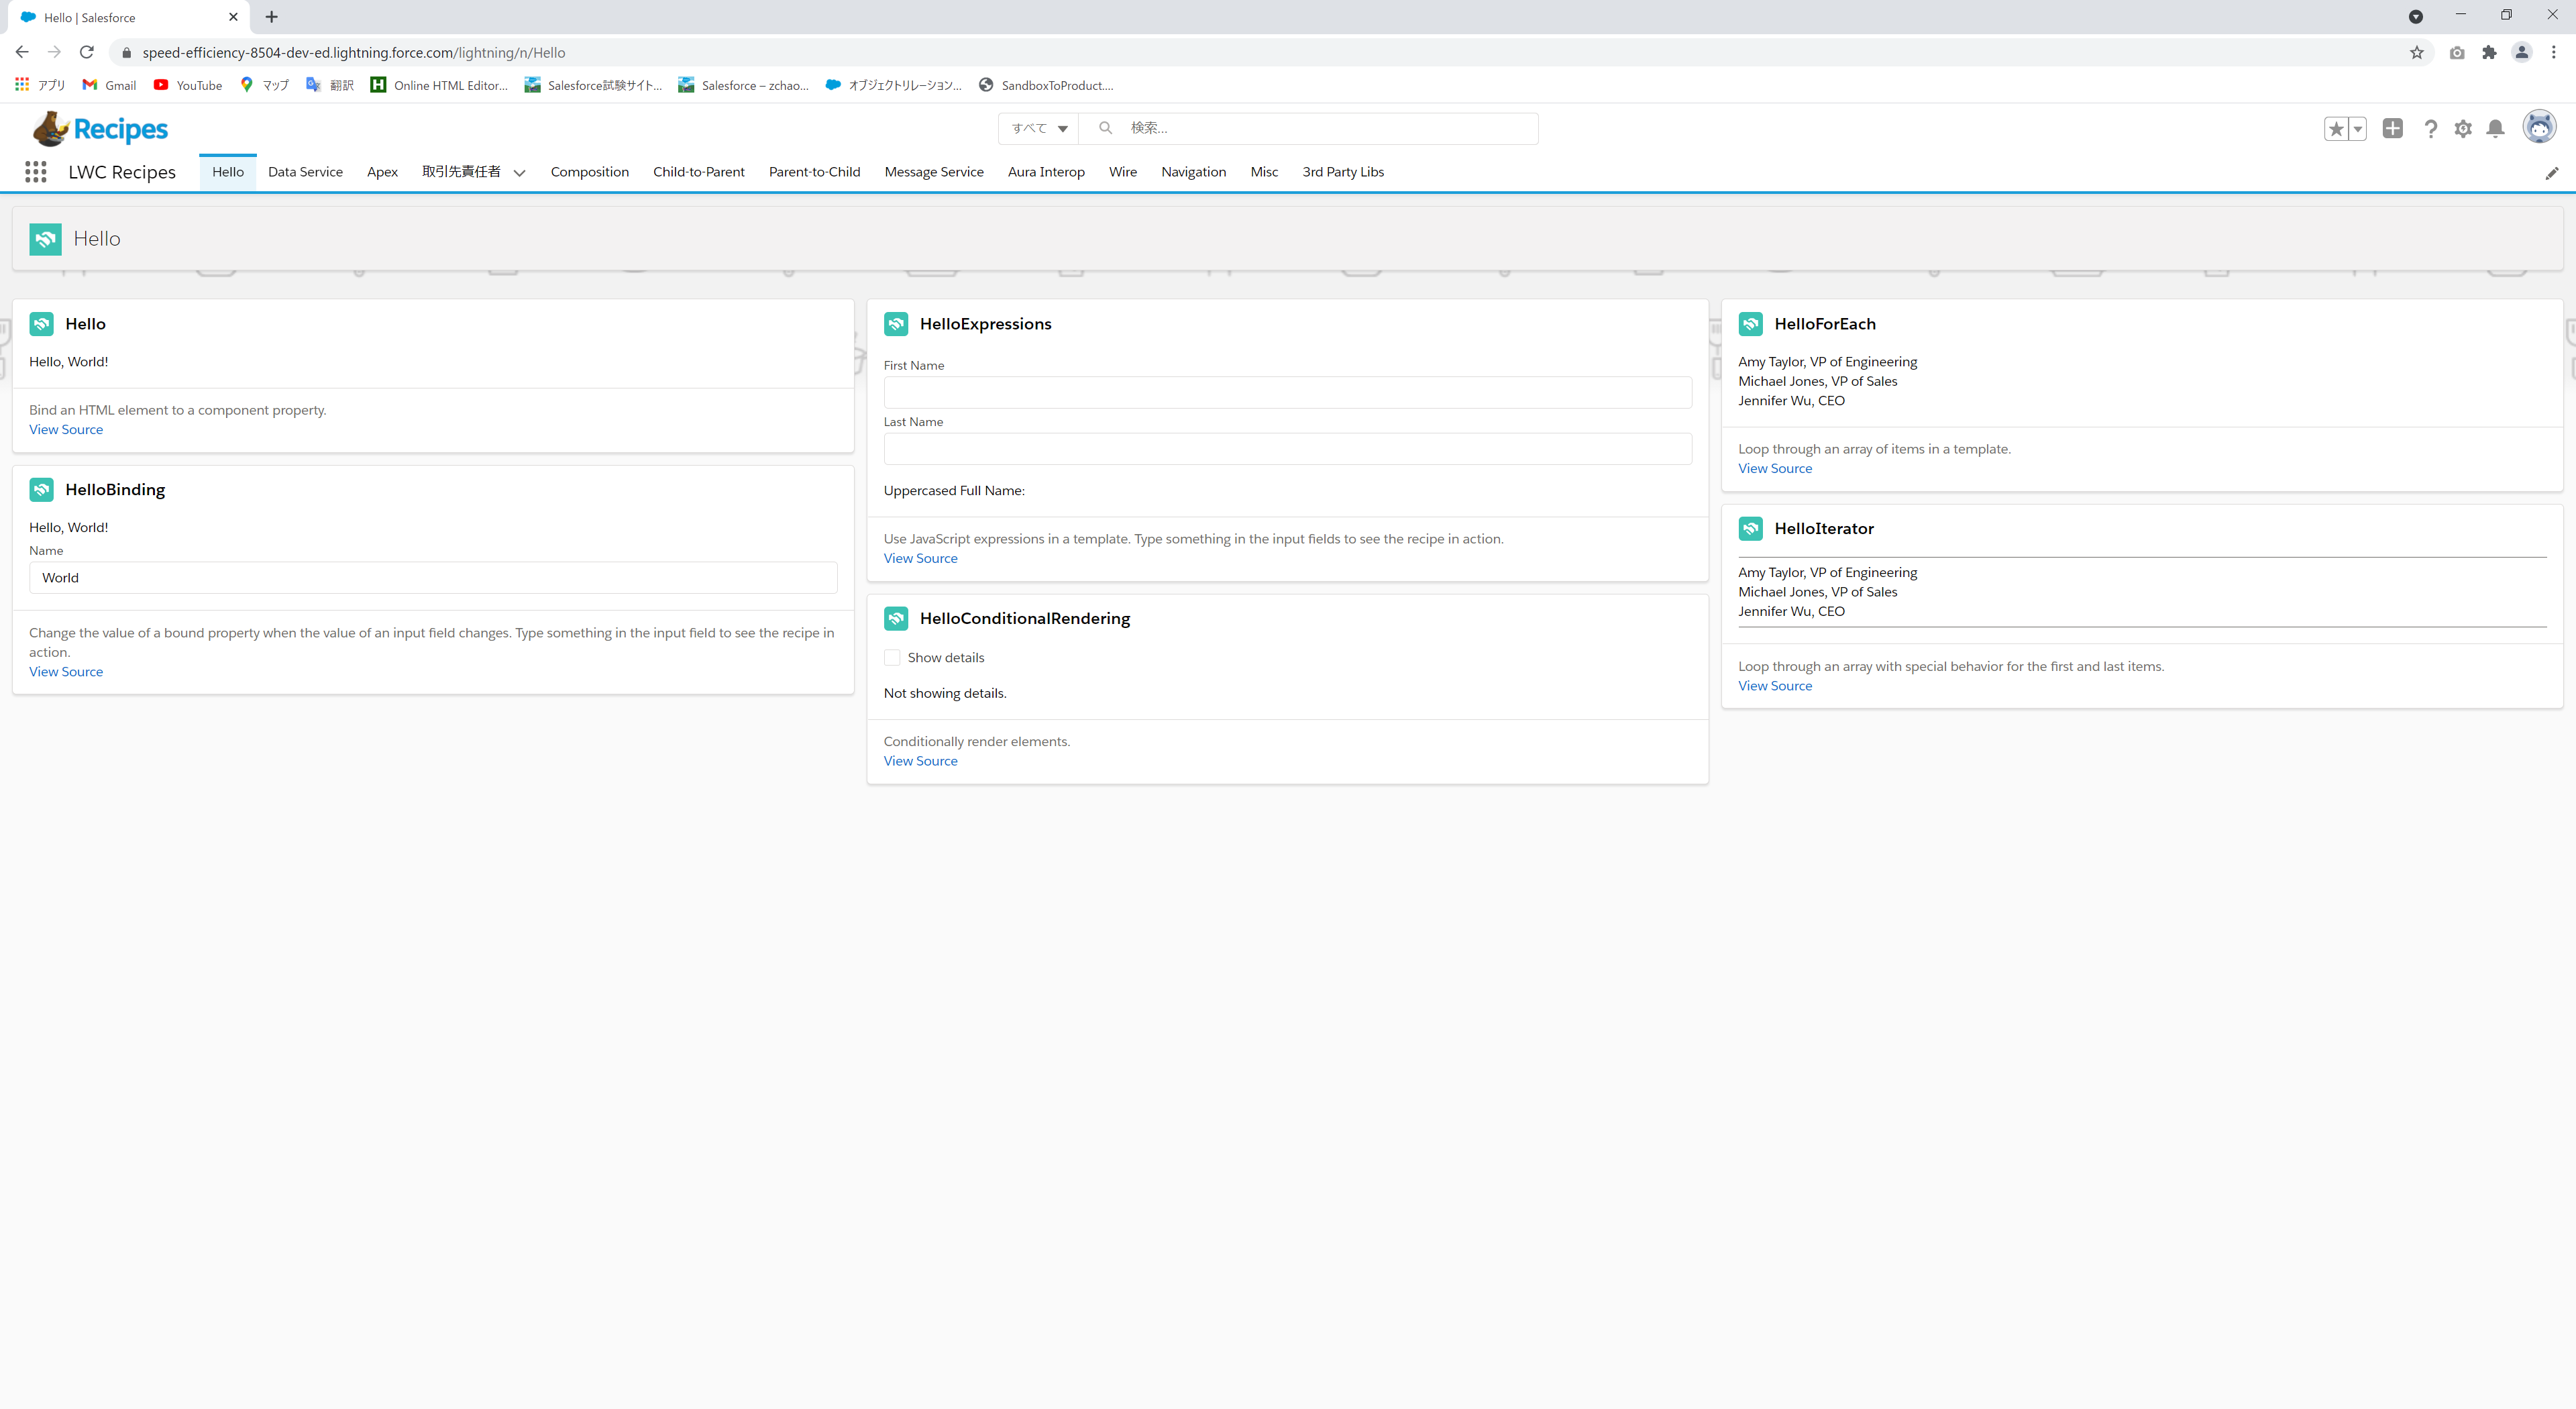
⑥設定結果

Scratch Orgを使用したアプリのインストール
※一時の環境の認識でよい、短期で使用する設定用の組織、主に実装/単体テストのフェーズで開発者単位に作成して動作確認を行うために使用します。
①Dev Hub有効化する

②SalesforceCLIインストール
③Visual StudioCodeインストール
④VSCodeにSalesforce Extension Packインストール
⑤以下のコマンド実行、接続環境設定
sfdx auth:web:login -d -a myhuborg
-d:ログインの組織をスクラッチ組織作成のデフォルト環境に設定
-a :別名設定


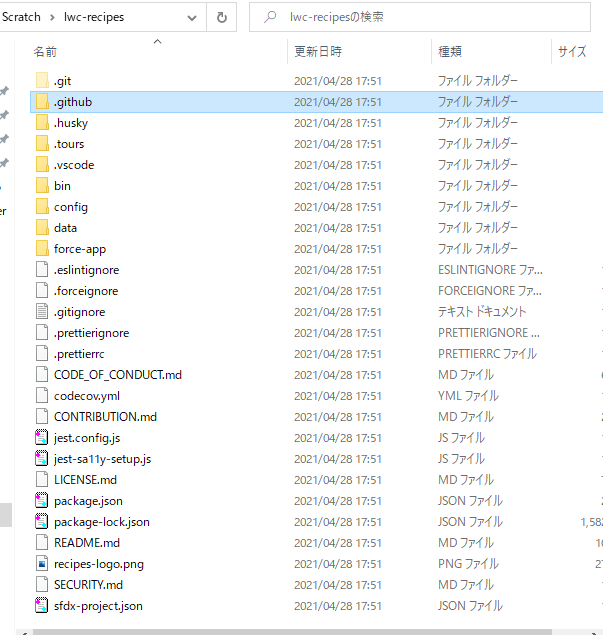
⑥Gitから既存のlwc-recipesリポジトリのクローンを作成
cd lwc-recipes```

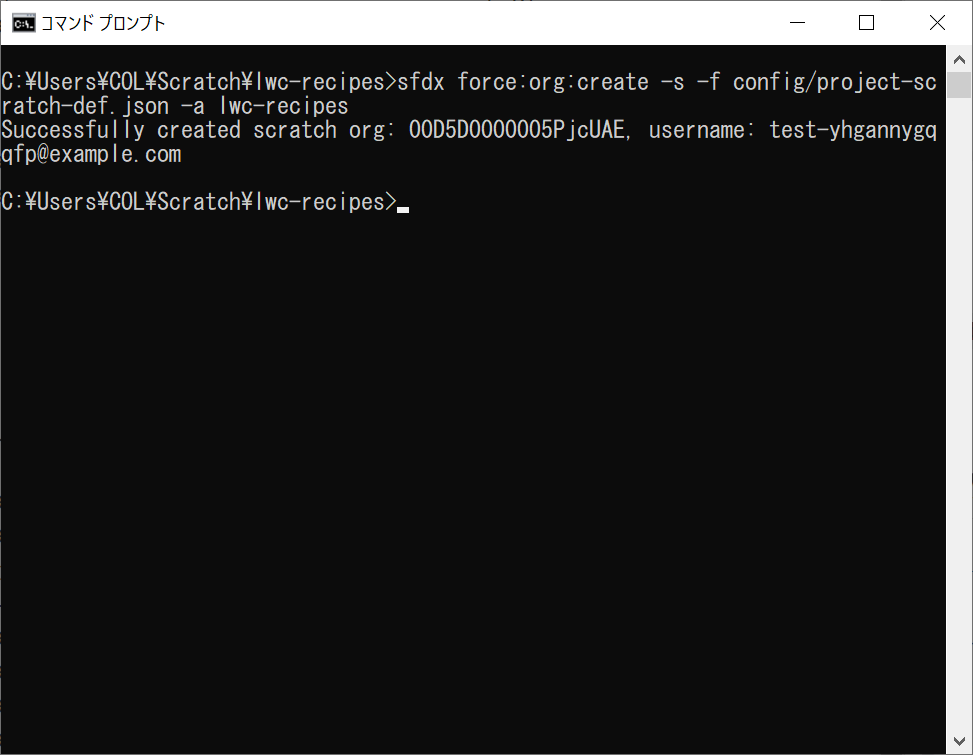
⑦スクラッチ組織を作成
```sfdx force:org:create -s -f config/project-scratch-def.json -a lwc-recipes```
-s:作成した組織をデフォルトのユーザー名として設定
-f:組織定義ファイルへのパス
-a:作成された組織の別名
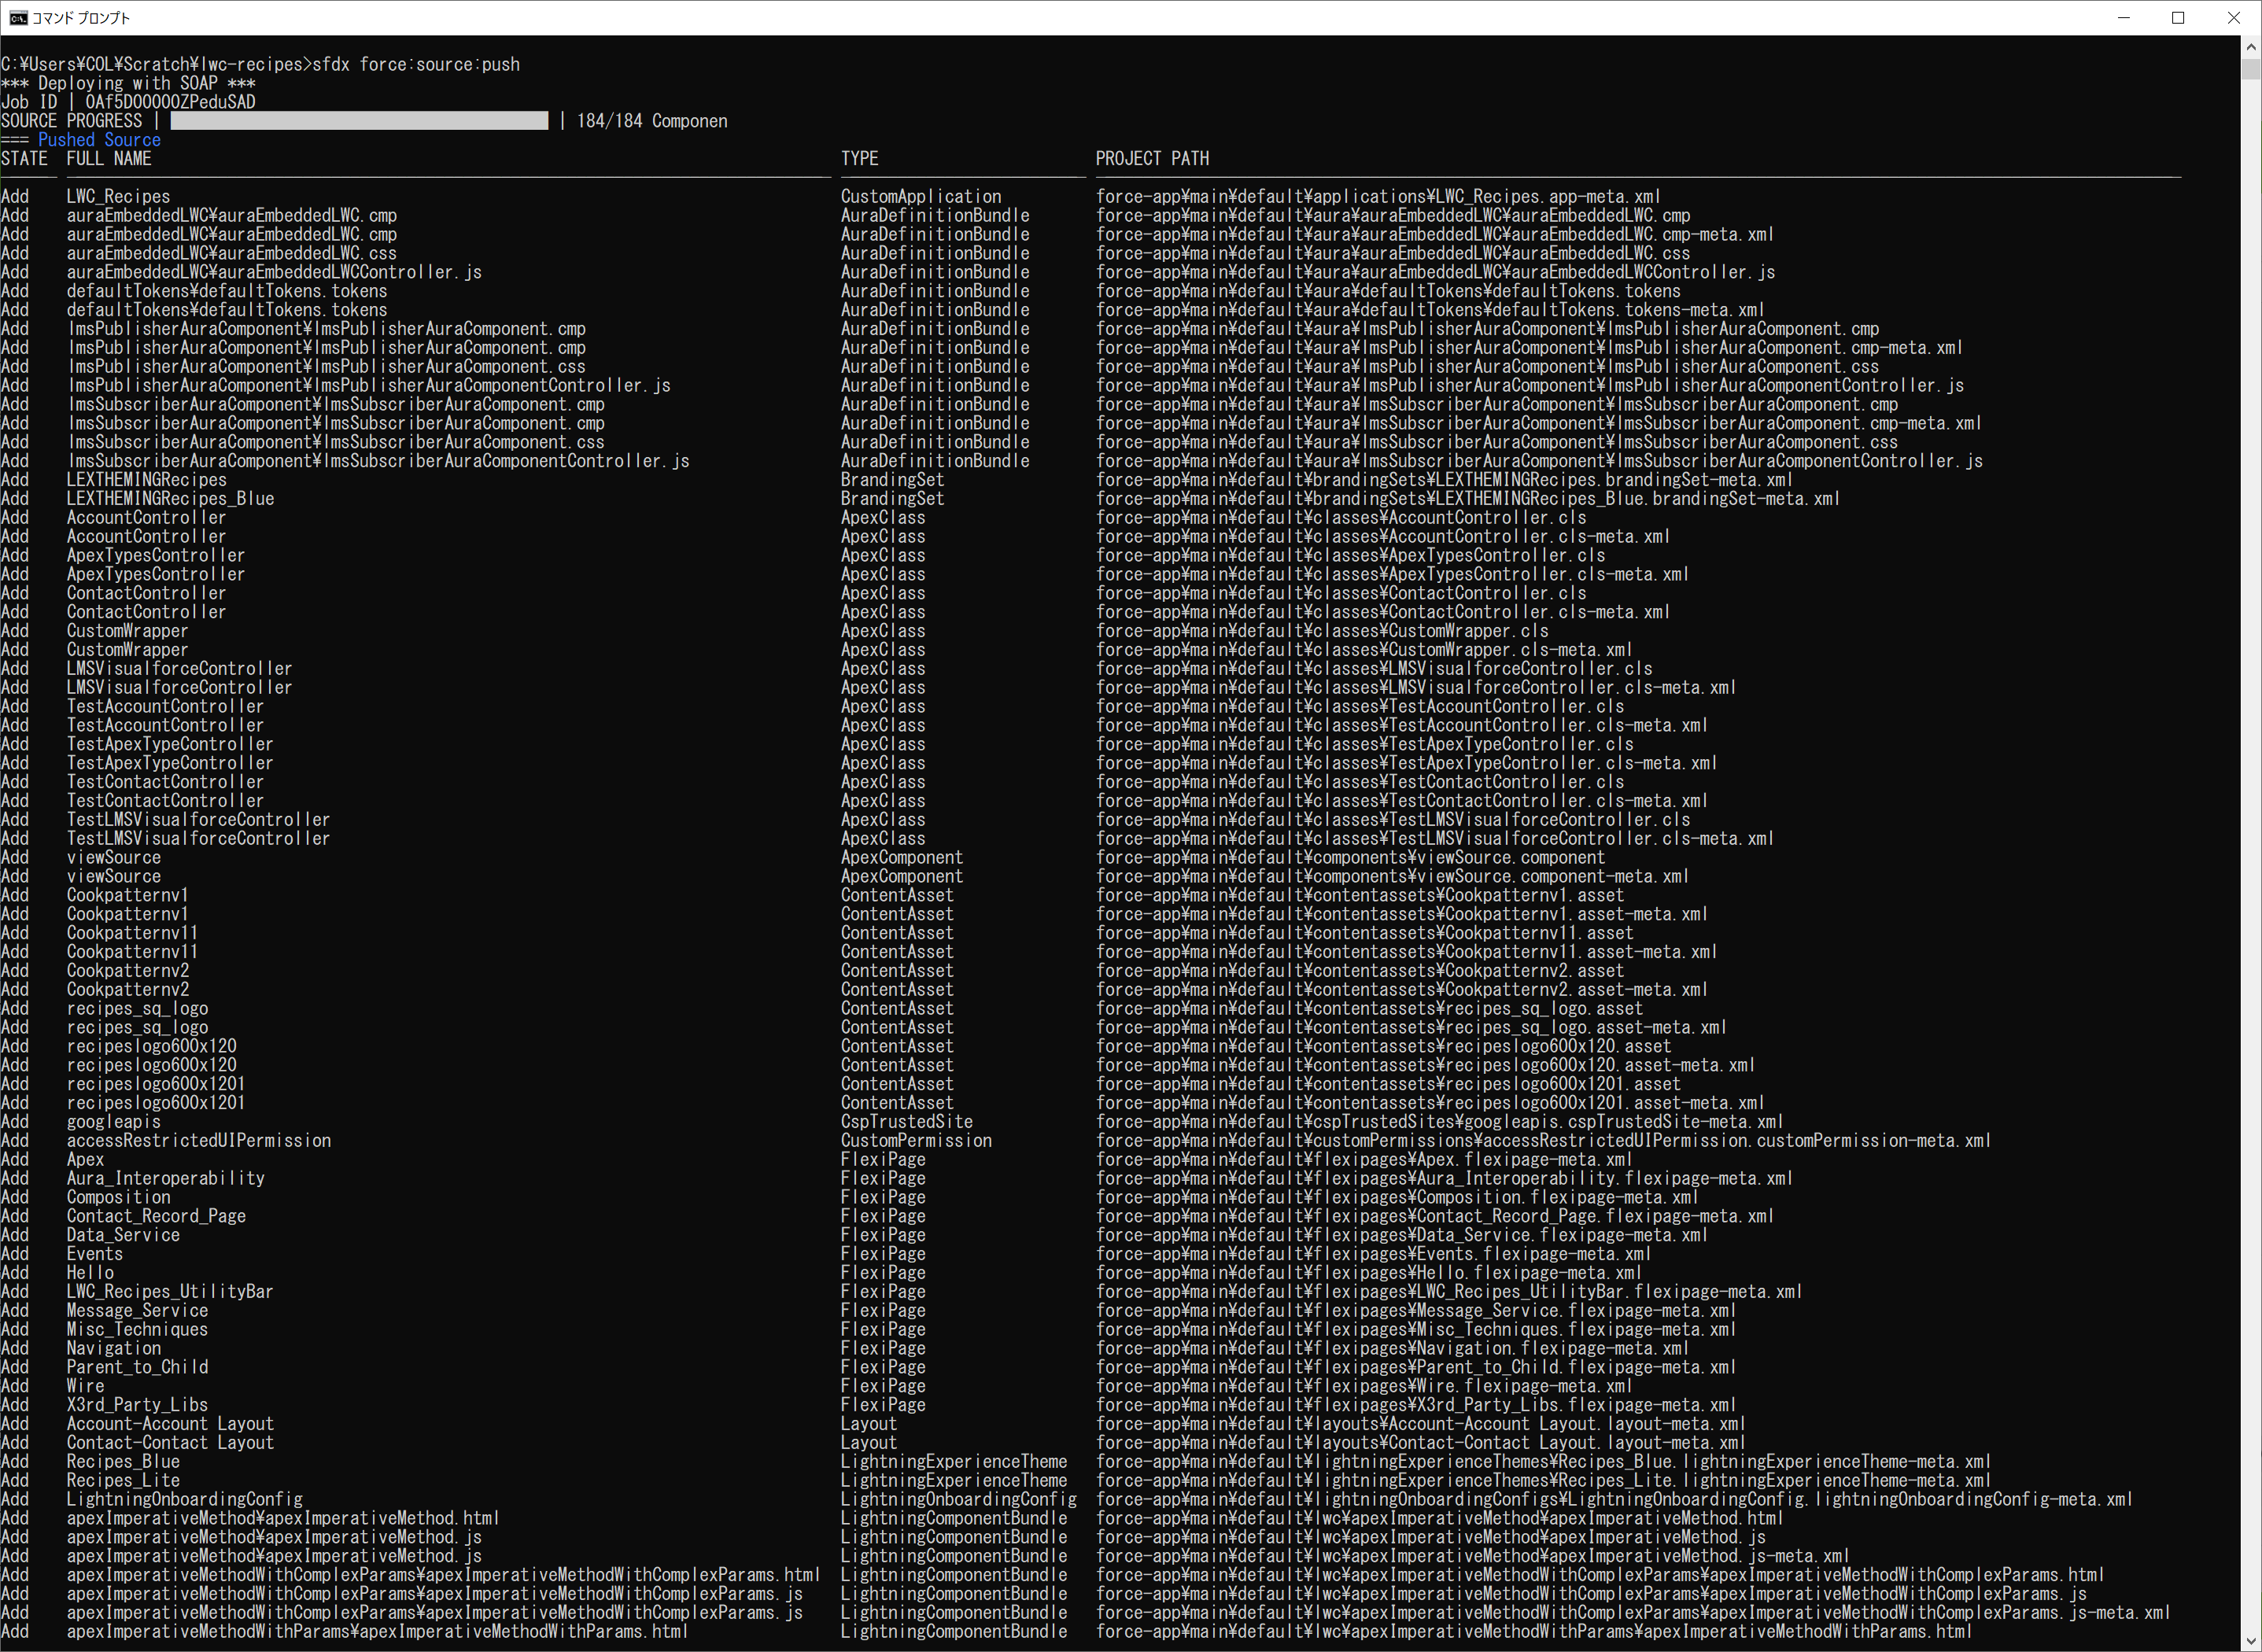
⑧アプリをプッシュする
```sfdx force:source:push```
⑨権限セット設定(権限セットの名前は「recipes」)
```sfdx force:user:permset:assign -n recipes```

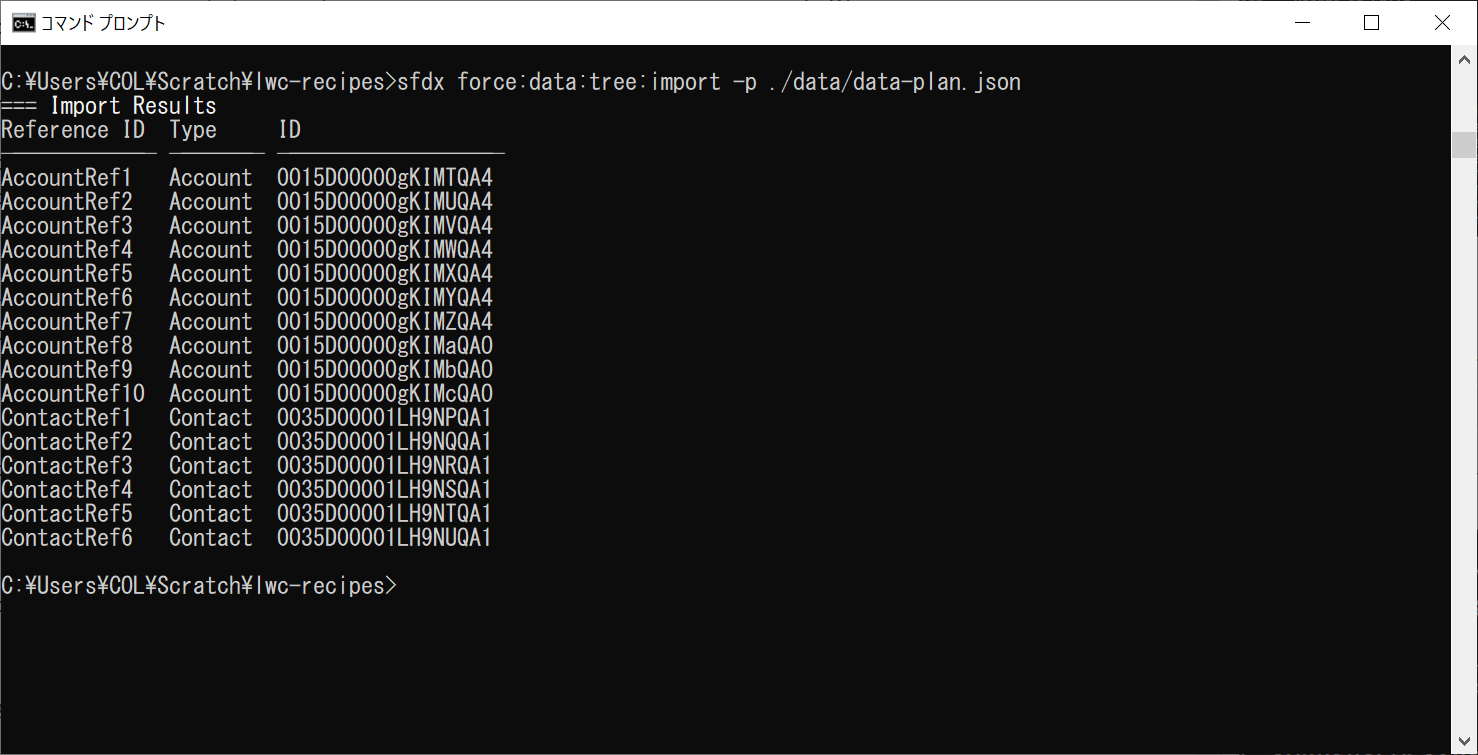
⑩サンプルデータのインポート
```sfdx force:data:tree:import -p ./data/data-plan.json```
⑪スクラッチ組織起動
```sfdx force:org:open```
テーマおよびブランド設定
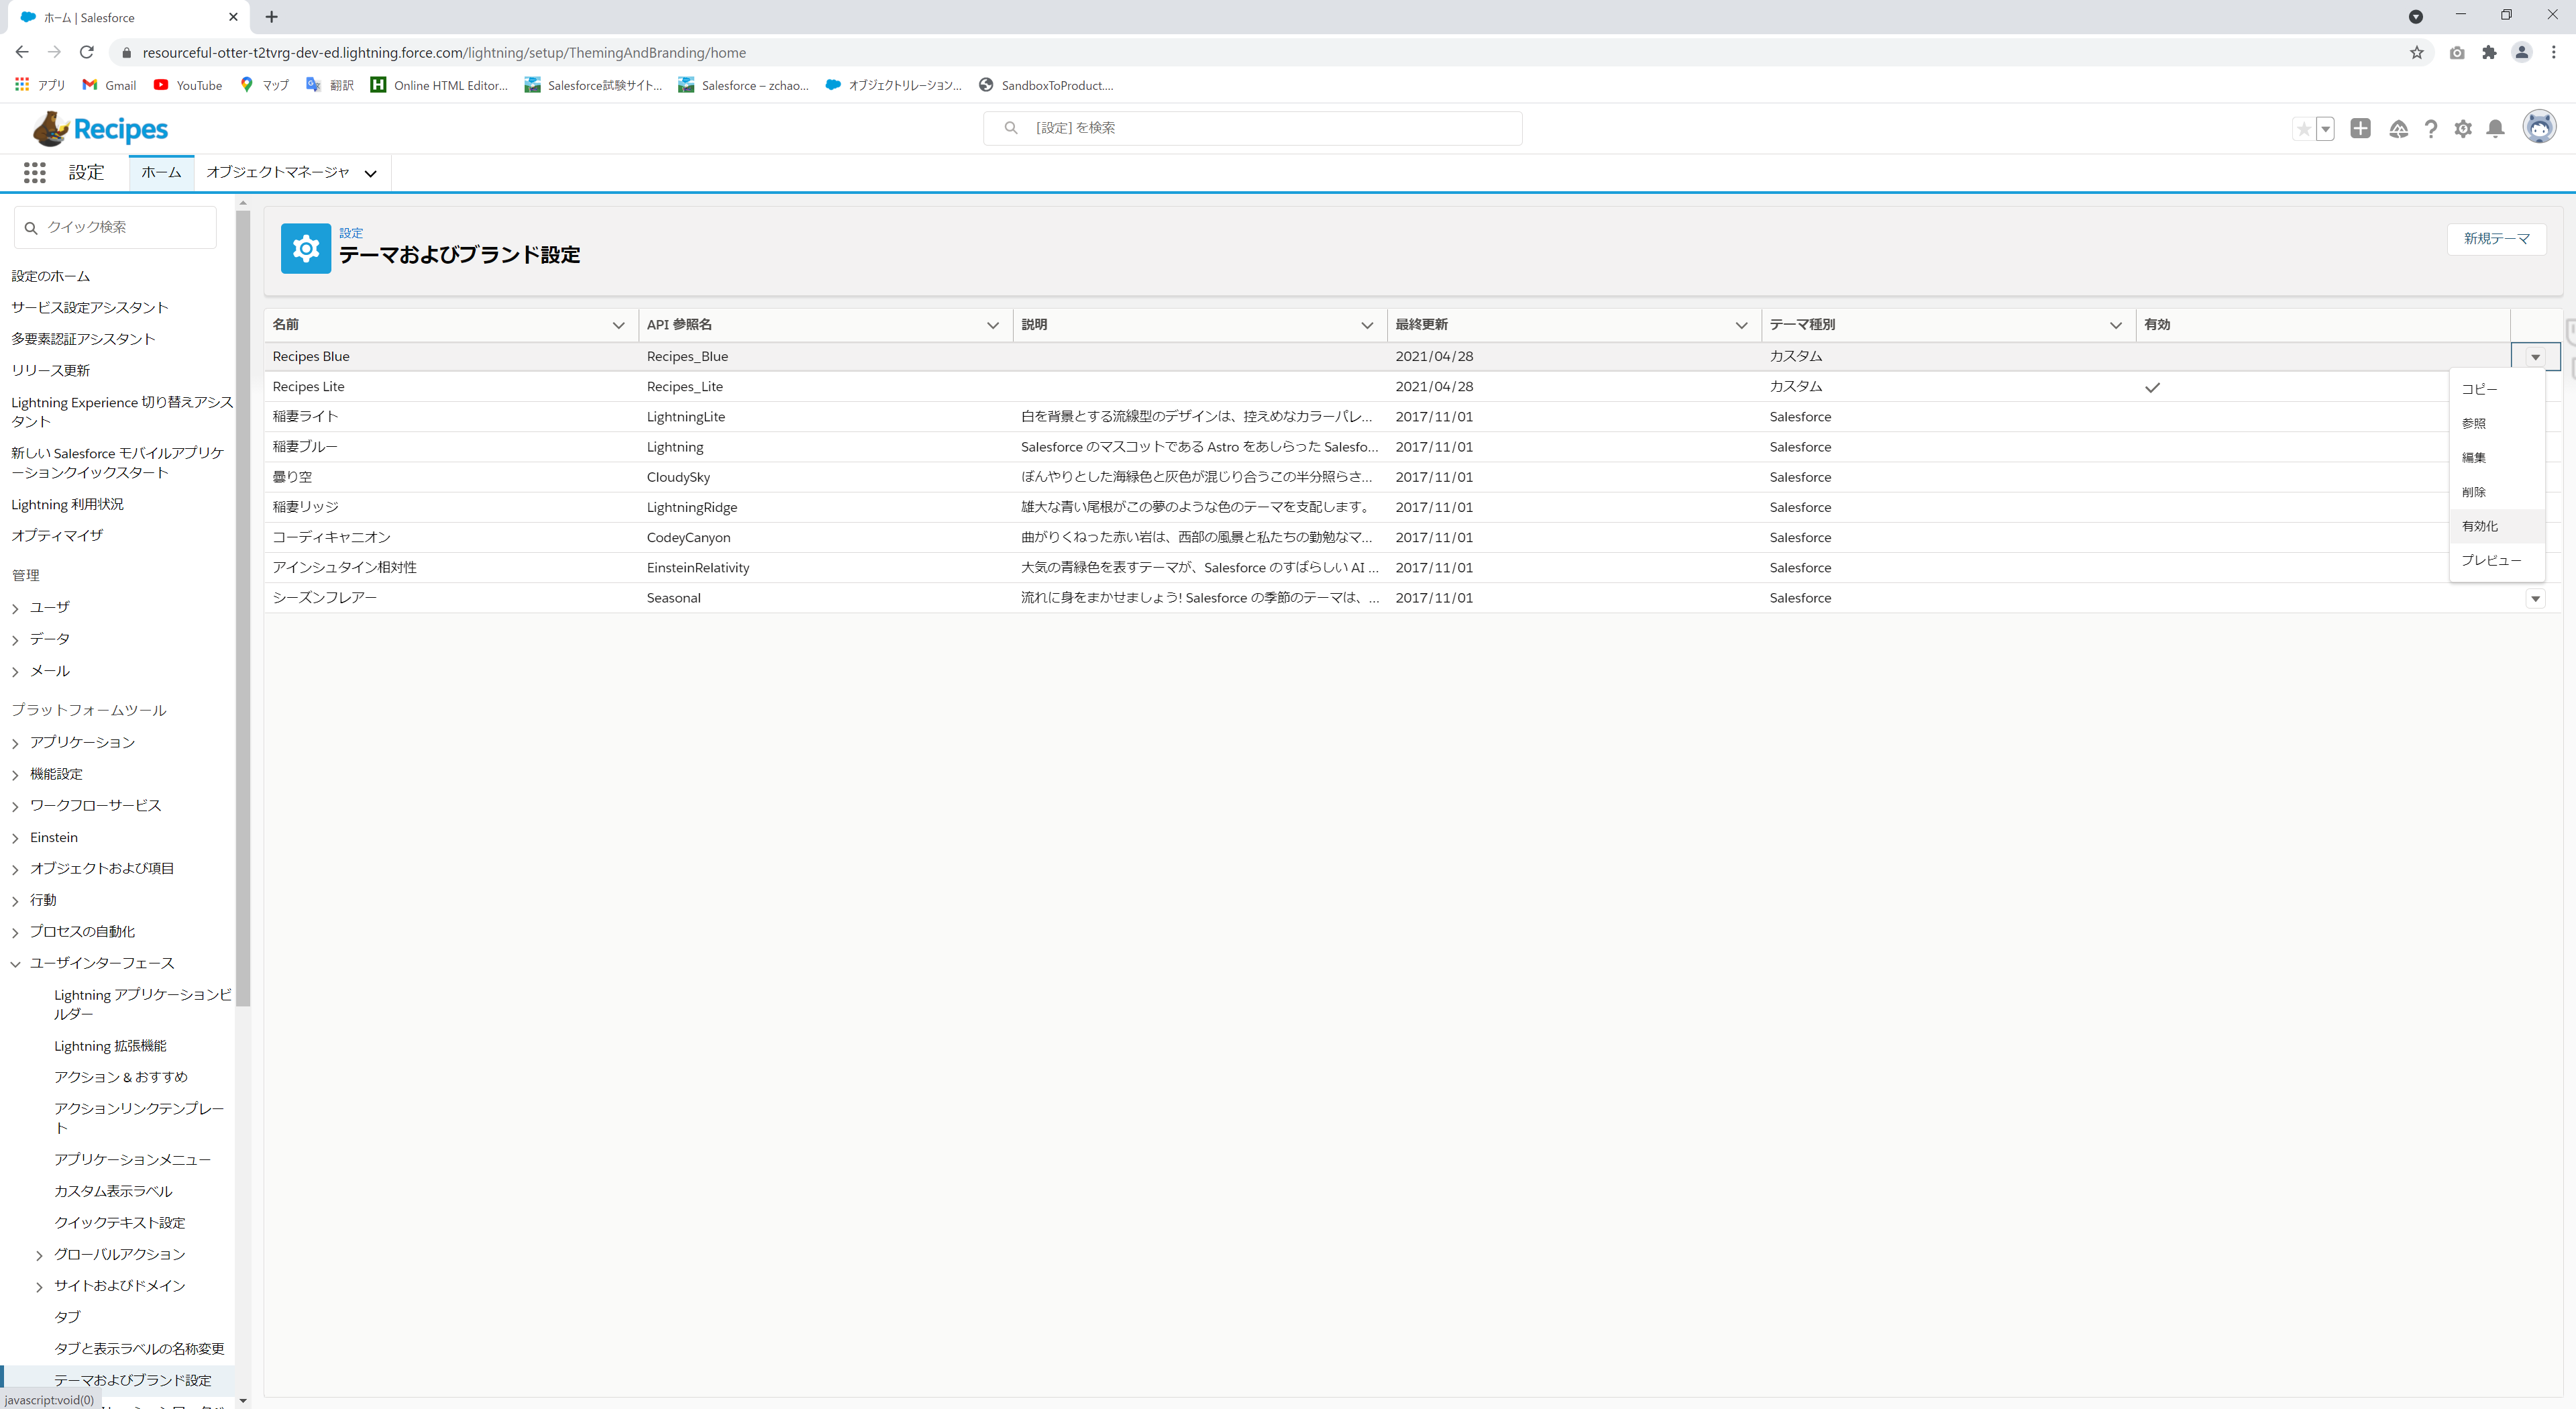
⑫設定結果
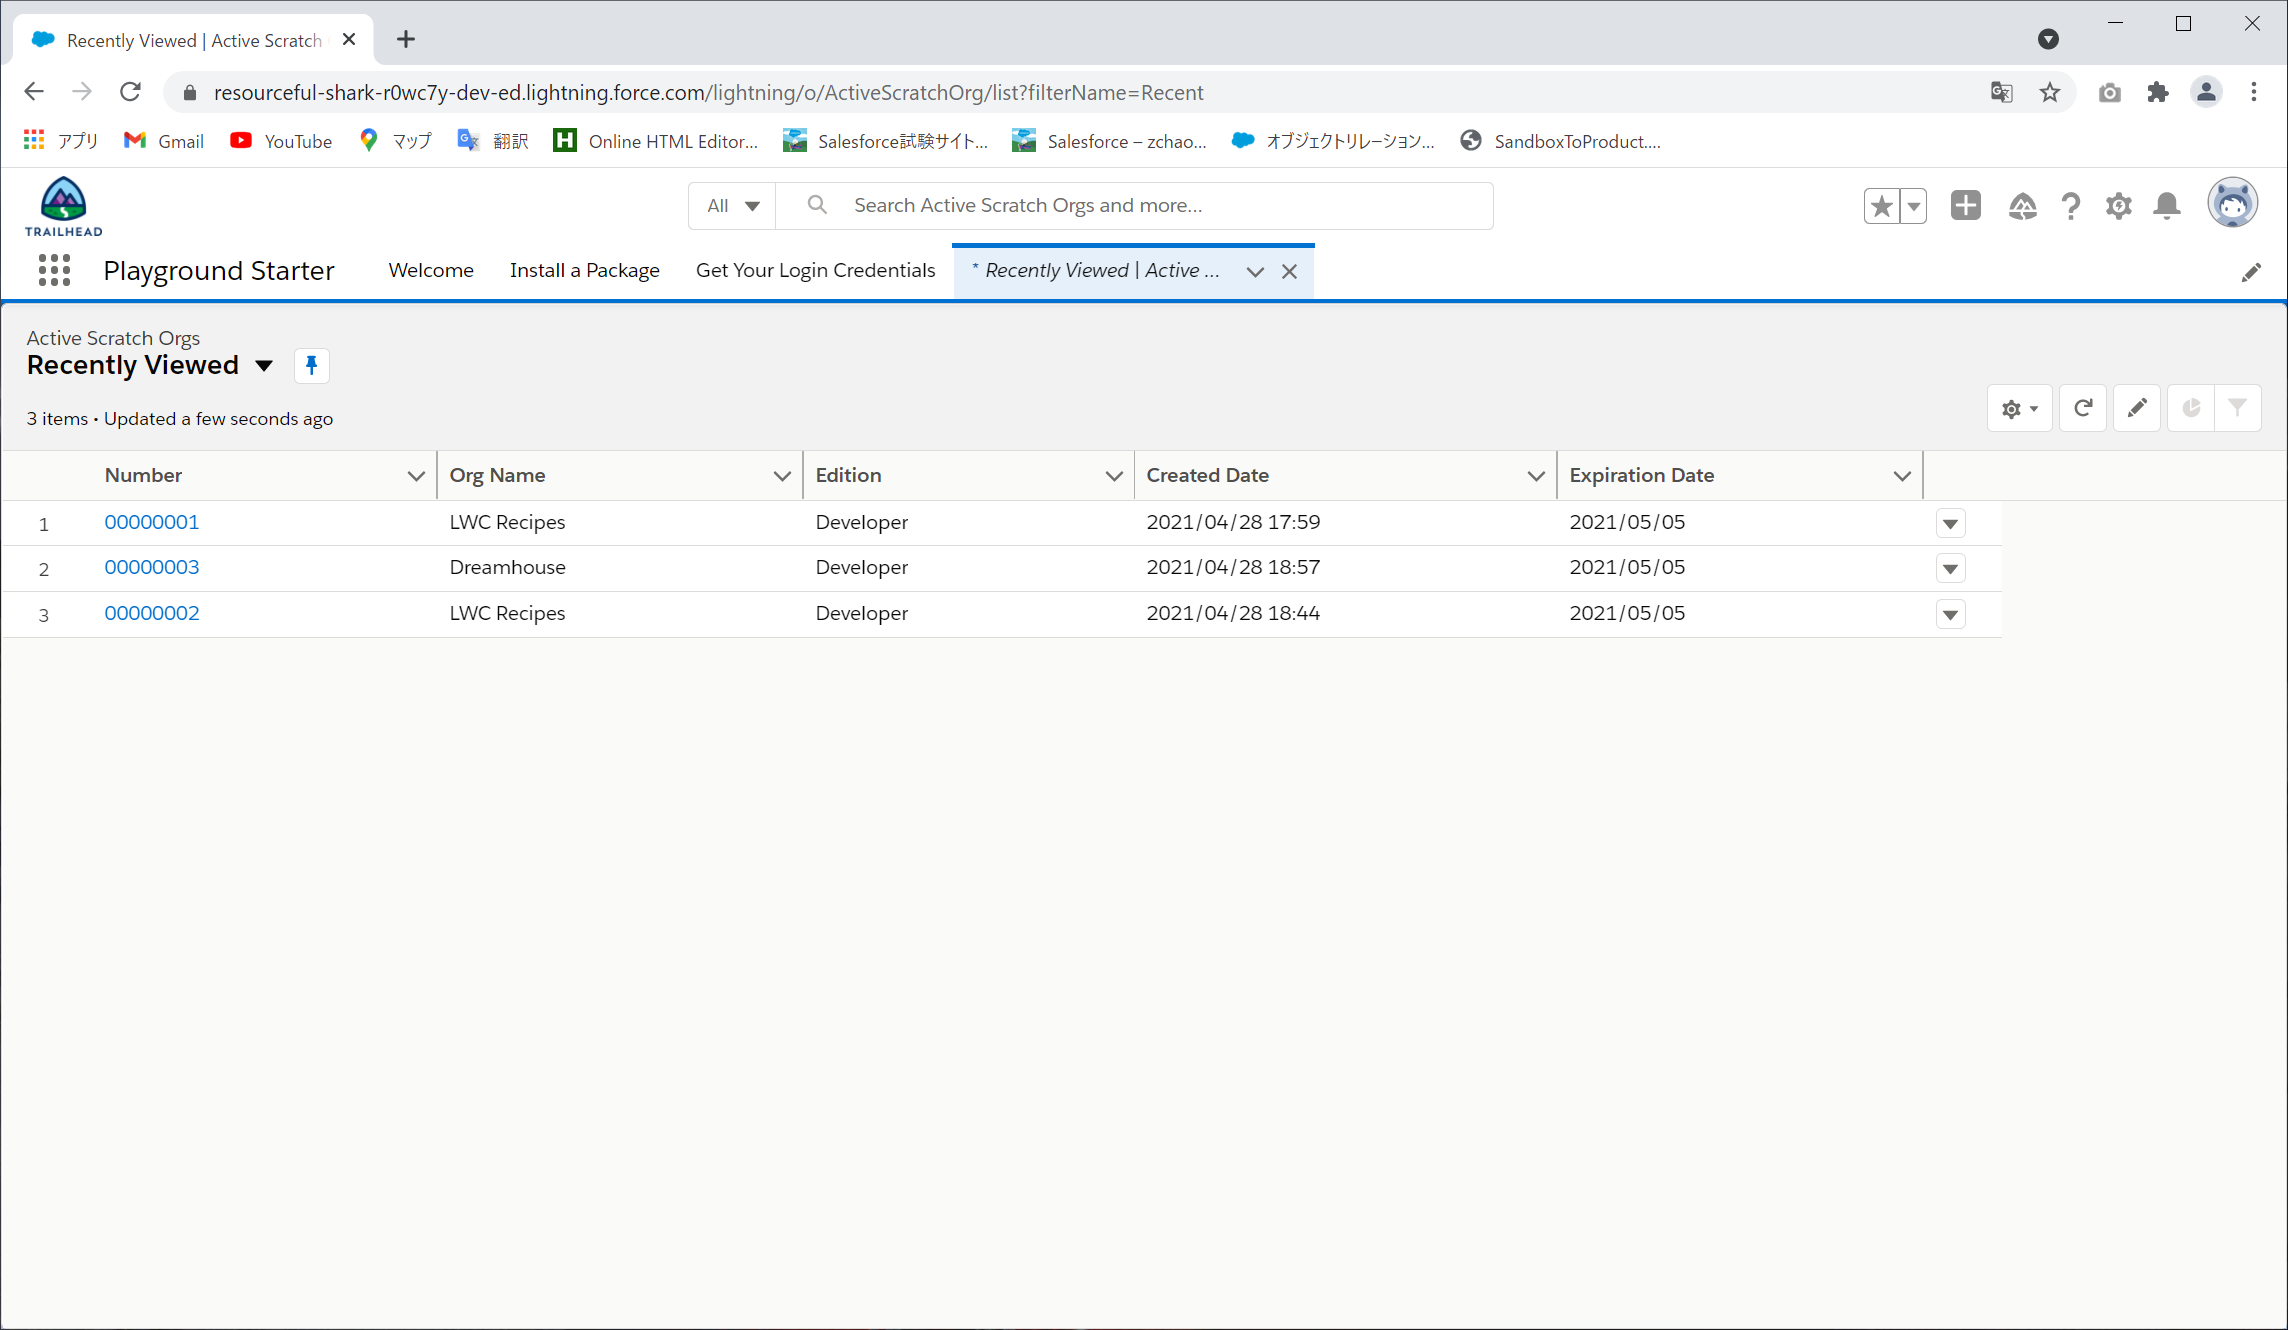
⑬スクラッチ組織の確認
英語:Active Scratch Orgs 日本語:スクラッチ組織情報
## DeveloperEdition組織またはTrailheadPlaygroundを使用したアプリのインストール
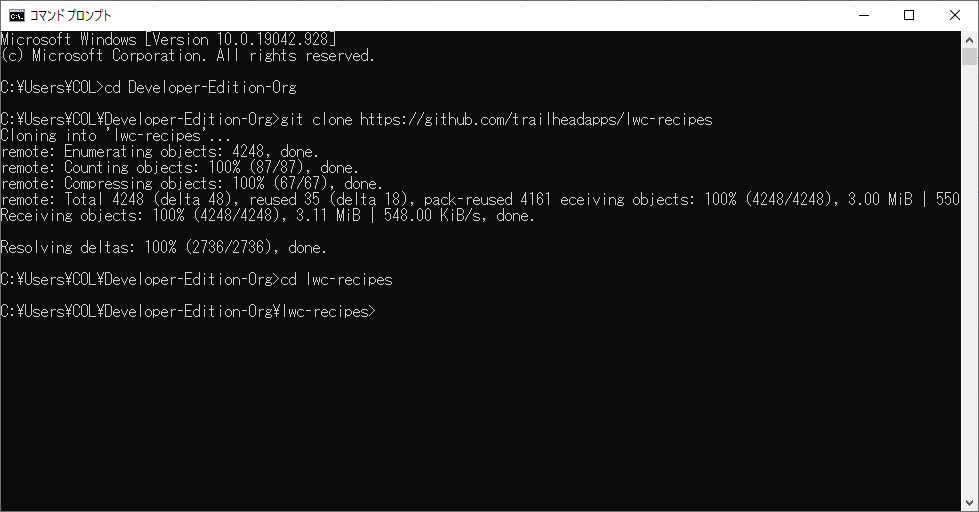
①Gitから既存のlwc-recipesリポジトリのクローンを作成
```git clone https://github.com/trailheadapps/lwc-recipes
cd lwc-recipes```
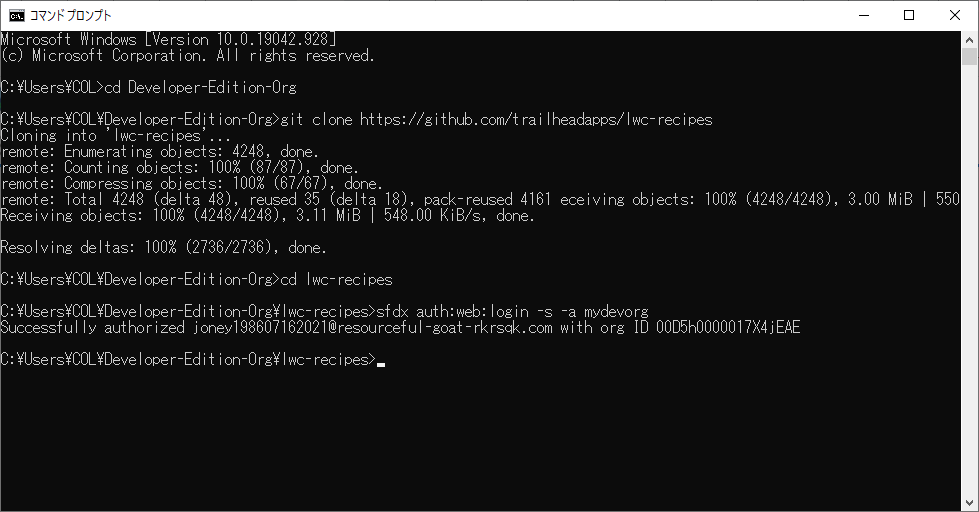
②Trailhead PlaygroundまたはDeveloper組織接続(「mydevorg」は別名)
```sfdx auth:web:login -s -a mydevorg```
-s:ログインの環境
③アプリケーションデプロイ
```sfdx force:source:deploy -p force-app```
④権限セットをデフォルトユーザーに割り当て
```sfdx force:user:permset:assign -n recipes```
⑤データインポート
```sfdx force:data:tree:import -p ./data/data-plan.json```
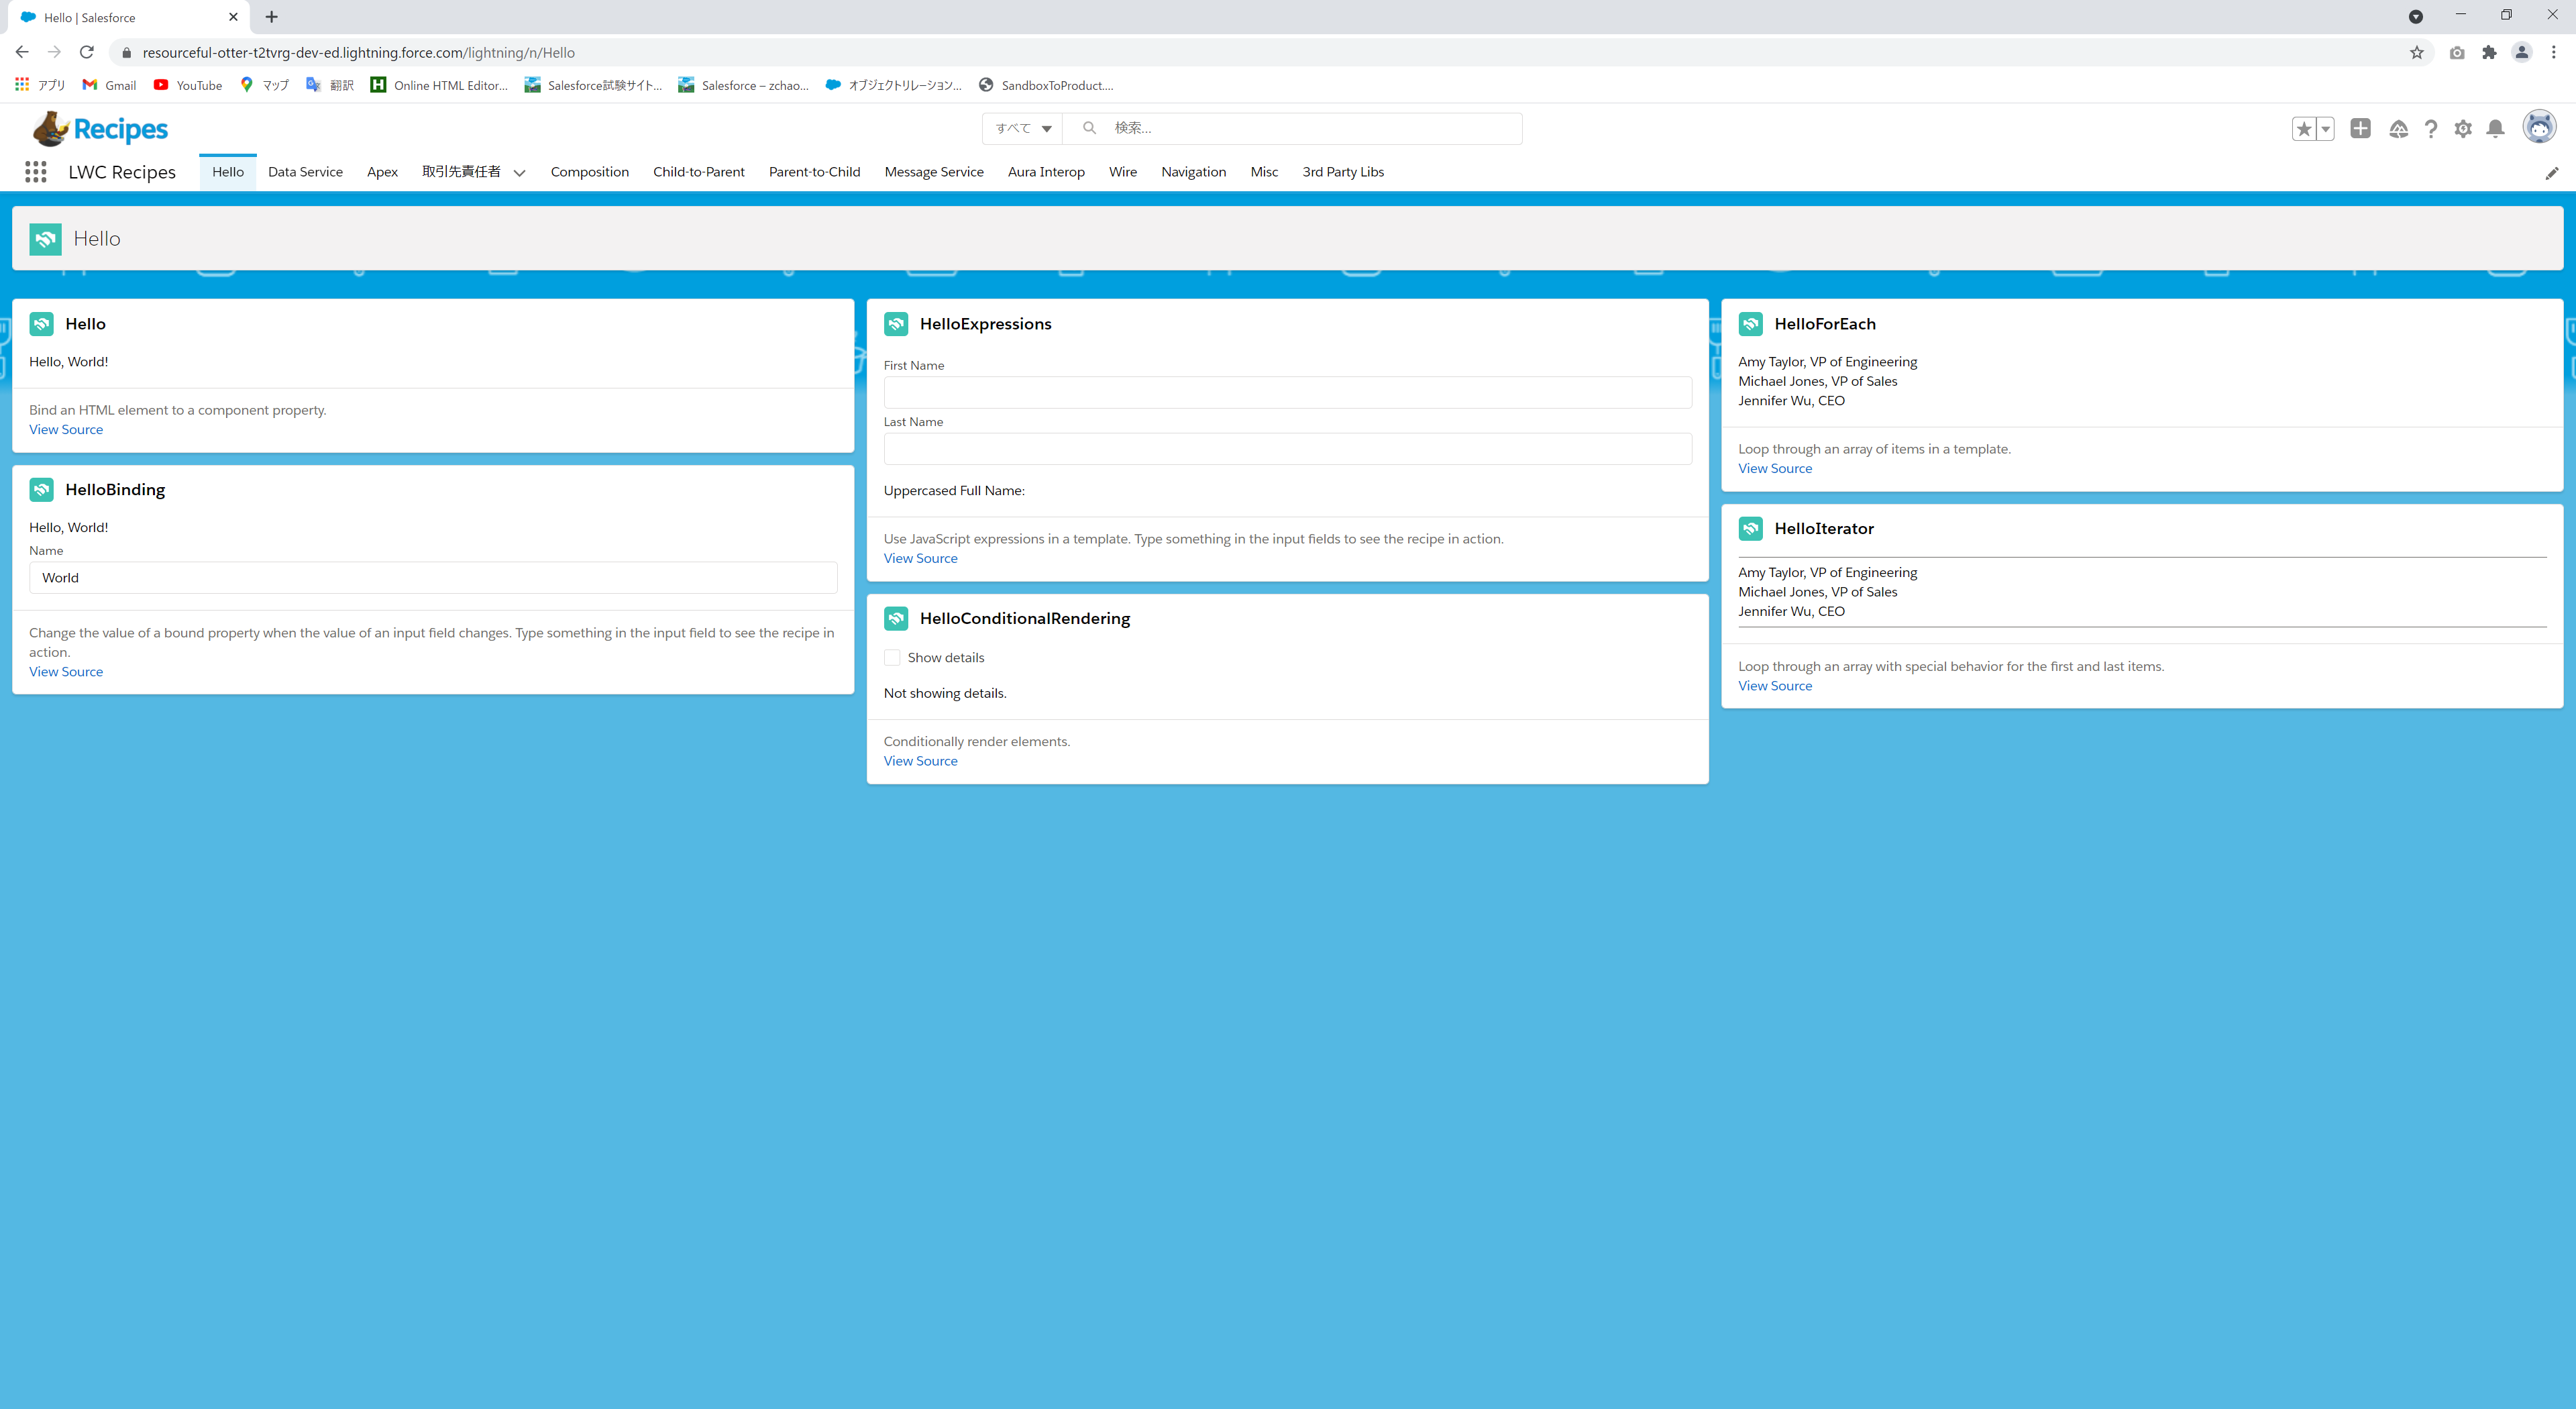
⑥組織開く
```sfdx force:org:open -u mydevorg```
⑦テーマおよびブランド設定

⑧設定結果
Author And Source
この問題について(Salesforce Platform Developer I:LWC Appインストールの三つ方法), 我々は、より多くの情報をここで見つけました https://qiita.com/joney19860716/items/3bbc857b1168e51976da著者帰属:元の著者の情報は、元のURLに含まれています。著作権は原作者に属する。
Content is automatically searched and collected through network algorithms . If there is a violation . Please contact us . We will adjust (correct author information ,or delete content ) as soon as possible .